With DSM version 7 Synology decided to remove the SVN Server package from their distribution. Many developers, including myself, were caught by surprise. After upgrading to DSM V7.x, SVN just didn’t work anymore. It was gone! I have to admit that I didn’t pay attention to the release notes and I found out the hard way because my TurtoiseSVN client couldn’t connect to the repository anymore.
After evaluating my options I had to make a decision between downgrading my Synology NAS or running SVN inside of a Docker container. I didn’t want to downgrade so I decided for the Docker solution. I think Docker might come in handy later because there are a few things such as home automation that I’d like to try as well. If you’re interested in home automation, the image you’re looking for is Home Assistant. But I digress . . .
I need to mention that I have never worked with Docker or SVN Server before. I only used TurtoiseSVN for configuration management while the server was an easy to use DSM package. I had a bumpy ride!
Getting Docker
My decision to use Docker created another challenge because my DS416play DSM does not include the Docker package. Fortunately there is a manual install option in the Package Center. I downloaded the Docker package from the Synology archive at
and then used the manual install option of the Package Center. By the way, the latest Docker version may not work with your DSM version. If that’s the case you’ll see an error message during install and you have to go back and pick an earlier version from the archive.
Getting an SVN Server Image
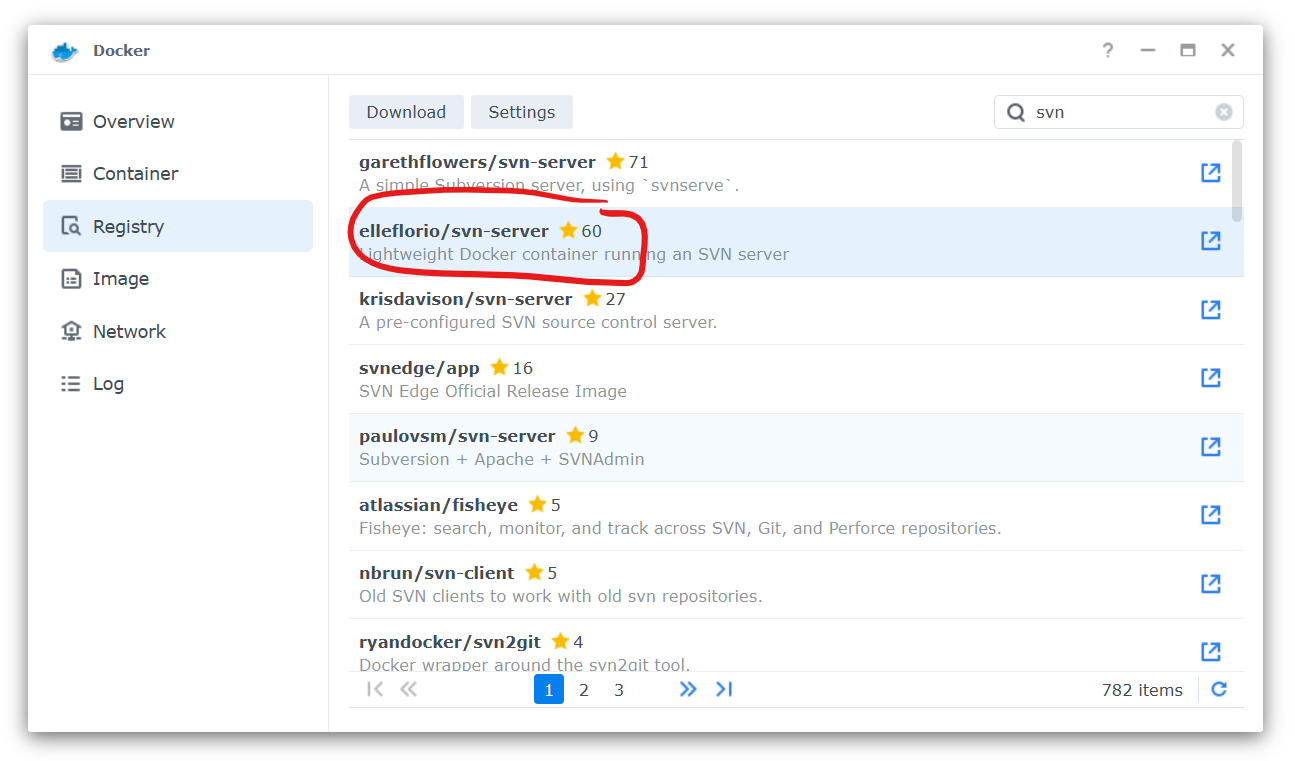
Next we need an SVN Server image to run inside our Docker container. There are several SVN images available at the Docker Hub. Looking at what’s available I opted for the elleflorio/svn-server. You can find an image through the Docker Registry tab by typing svn into the search box, select which image you want, and then chose Download.
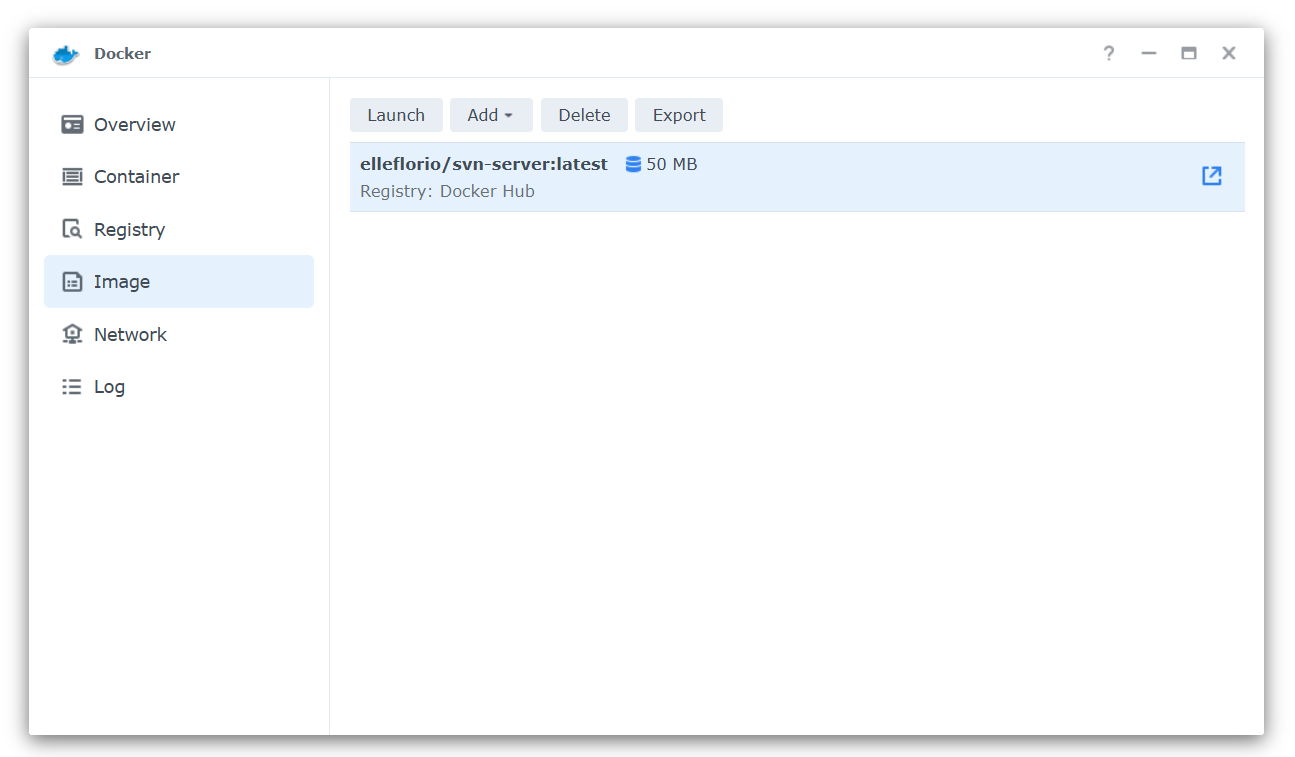
Once the package is downloaded the image is available on the Docker Image tab.
Creating a Docker Container
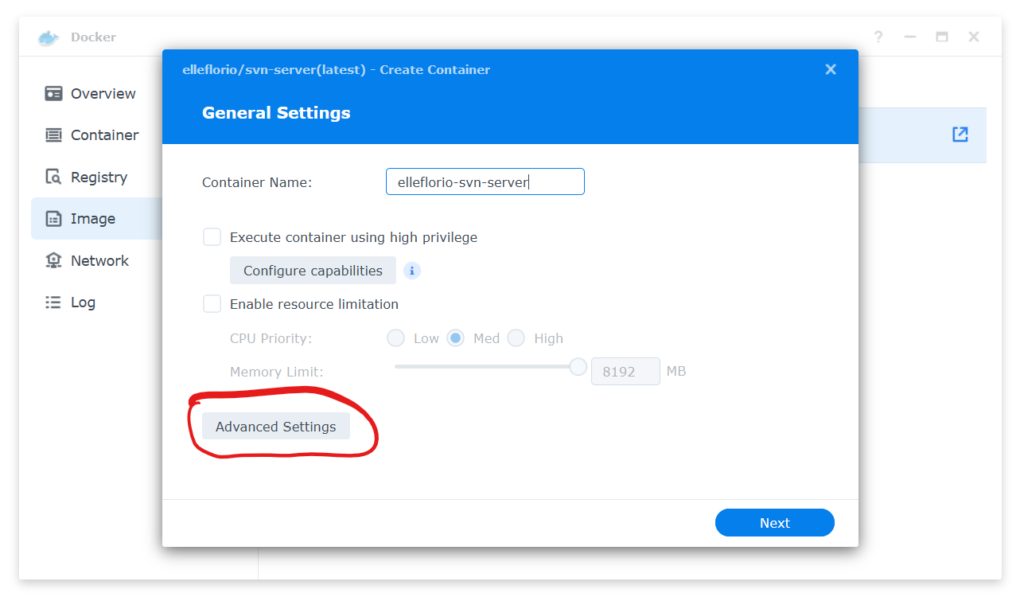
It’s time to create a Docker Container and launch the image. After clicking the Launch button we’ll get to the container settings. By the way, you can execute all these steps from a command line interface using PowerShell or PuTTY and SSH. All the CLI commands you need are listed at the Docker Hub page. But I’m lazy so I take the “easy way”. Click on Advanced Settings.
There’s one very important step in this process and that is to mount a Volume which is being used to store the repositories. Docker creates a share during install called “Docker”. Since I plan to have more than one container, each with a different purpose, I created a folder named SVN inside the Docker share for use by the SVN Server. We use this folder in the next step.
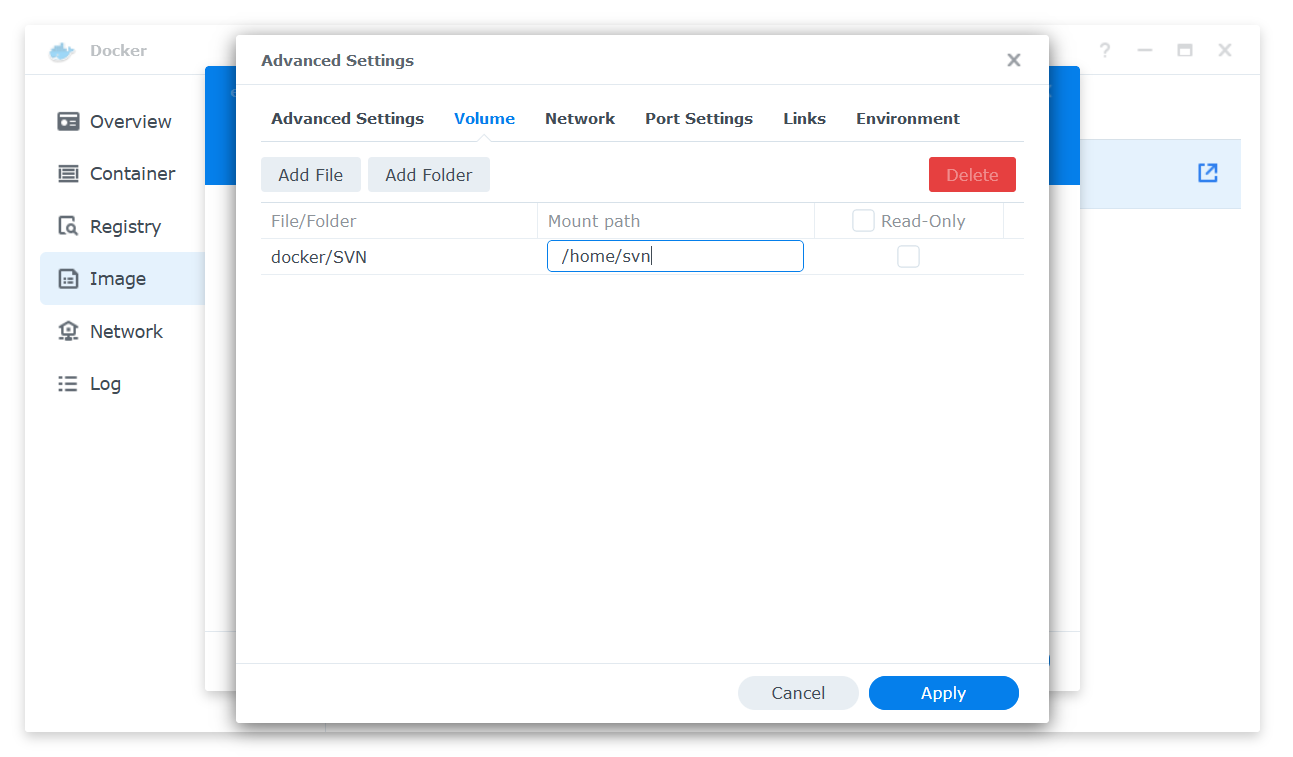
This folder needs to be mounted at /home/svn which is the default path from the SVN image. Other SVN images may use different paths. It is important to mount a volume outside of the container if you want to easily backup your repositories or access the repositories directly via file system. This comes in handy later when we have to configure access rights for the SVN repositories. Also make sure that “Read-Only” is NOT checked.
In this scenario the ports for accessing SVN Server are set automatically by the Docker configuration tool. If you want to map your own ports you’d want to change the values on the Port Settings tab. If you chose to keep the automatic setting the actual port settings can be found on the Docker Container tab under Details. Keep in mind that if you restart the container or reboot your NAS the ports may change!
Creating a Repository
From here on we need to use an SSH CLI to access the Docker container on the NAS. I use PuTTY but Windows PowerShell etc. work as well. First we want to test the SVN server and see if it’s running. To do so we need to create a SVN server username & password.
docker exec -t <your-server-name> htpasswd \
            -b /etc/subversion/passwd <username> <password>
This will allow us to check the SVN repository via browser http[s]://<your-nas-ip>:<your-port>/svn
If it’s working it will show an empty repository. Sometimes you’ll see a @eaDir directory. That’s something the NAS creates and it can be deleted. Next step, we need to create a repository. Since svnadmin is included in the image we can use the create subcommand:
docker exec -it svn-server \
       svnadmin create /home/svn/<repository_name>
Make sure you use the /home/svn/ path in front of the repository name. This will create the repository at the mounted file system not inside the container. If we check the repository again at http[s]://<your-nas-ip>:<your-port>/svn it will show a repository with your <repository_name>. You can also go to the Docker share and find everything there. Unless you’re very familiar with SVN Server, do not change what’s in the repository folder. It may corrupt your repository.
Configuring the SVN Server
The last step is to edit the SVN configuration files. Each repository has its own configuration files. The files are located at docker/<repository_name>/conf/.
First we edit the svnserve.conf file.
[general]
anon-access = none
auth-access = write
password-db = passwd
authz-db = authz
This basically says
- anonymous users have no access
- authorized users have write rights
- the password file name is “passwd”
- the authorization file name is “authz”
Additional details about the SVN configuration can be found at the Apache Subversion web site.
Next we have to add user[s] to the passwd file.
[users]
user_joe = user_joe_password
Each line is a user = password combination. Lastly edit the authz file.
[groups]
allaccess = user_name

[/]
@allaccess = rw
This creates an allaccess group and gives the user user_name access to all repositories from the repository root down. Again, more detail about this configuration can be found at the Apache Subversion web site.
This should be it to get your Docker SVN Server going. On first access with TurtoiseSVN or else it will ask you for your username/password. After that it’ll be a smooth ride.

